
📷 How to shoot the Milky Way on iPhone 13 Pro and iPhone 14 Pro
Last weekend I could finally test the iPhone’s night photo capabilities. The night sky was clear and the Milky Way was slightly visible over my head.
I tried to shoot the Milky Way on my iPhone for the first time and here is my first result:

No stacking, no guiding, only built-in camera software and remote camera control from my Apple Watch (one can use a timer instead). To be honest, I was impressed. Did you?
Well, that’s not that easy. Here is how the photo was looked like before editing:

Slightly better than I could see with my own eyes – a good result, but a huge peace of magic should be made in photo processing software.
| 💡 | Even photos made with professional DSLRs should be processed to get the best possible result. |
Personally, I prefer Pixelmator Photo for iOS. This is a great one-time purchase alternative to Lightroom or similar software with a powerful set of coloring tools.
Shooting steps
To get started, point your camera at the Milky Way or just starry sky and hold your phone still (use tripod for the better fixation).
In Camera app, select main camera and select night mode with longest exposure available (10 seconds).
If the phone is stationary, exposure will be turned into max available – 30 seconds. Set timer or take a photo remotely from your Apple Watch Camera app.
Once done, if everything is ok, you have to do final step.
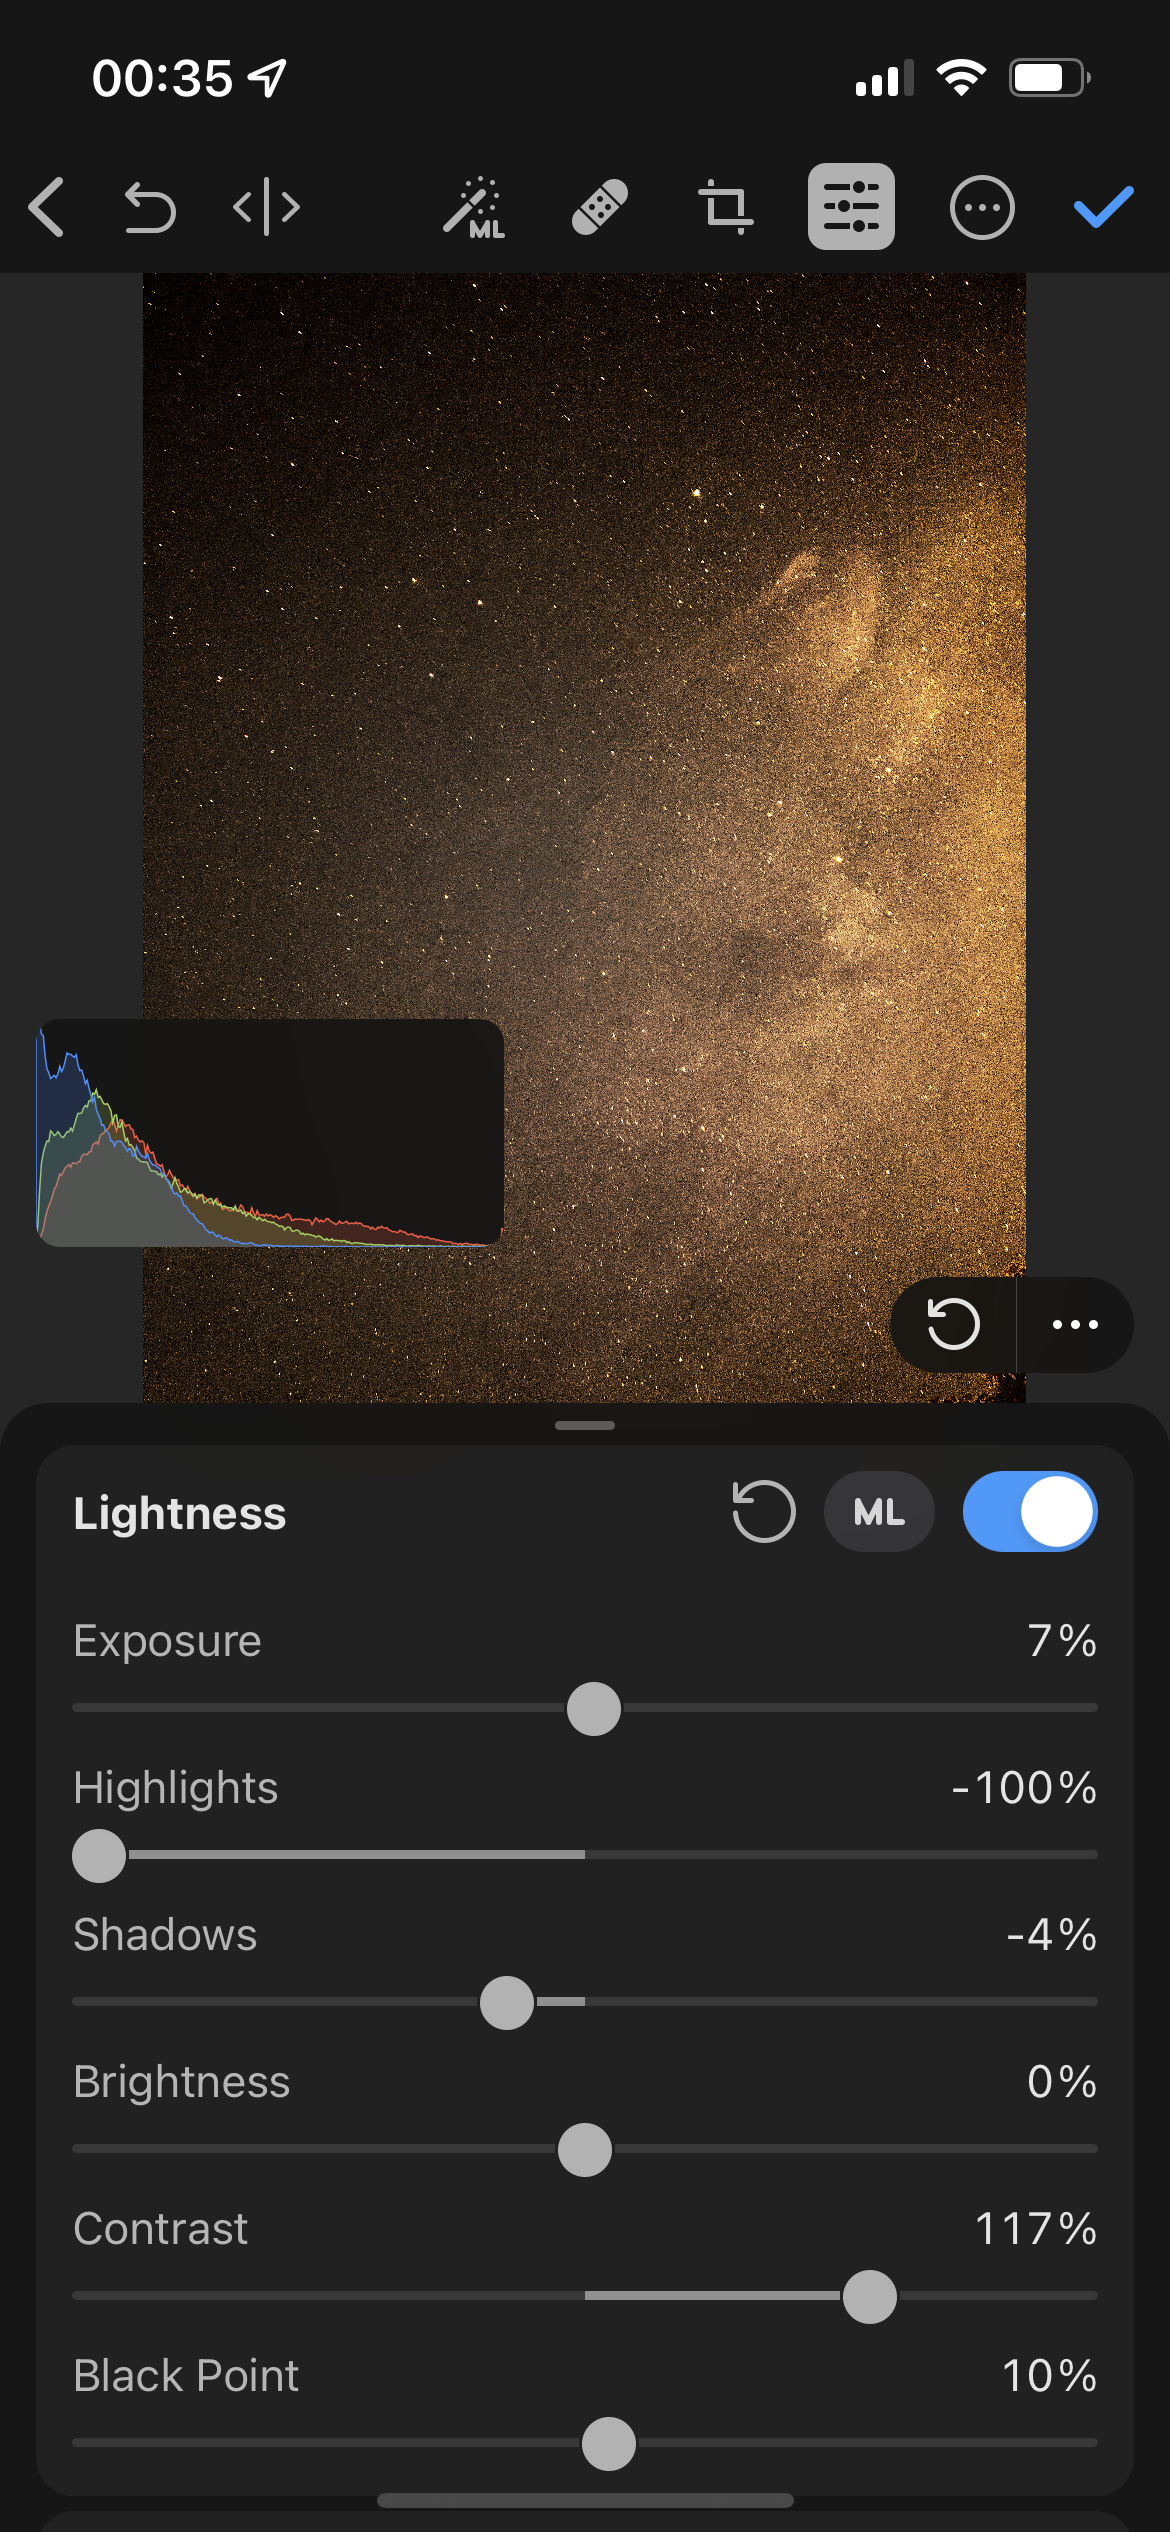
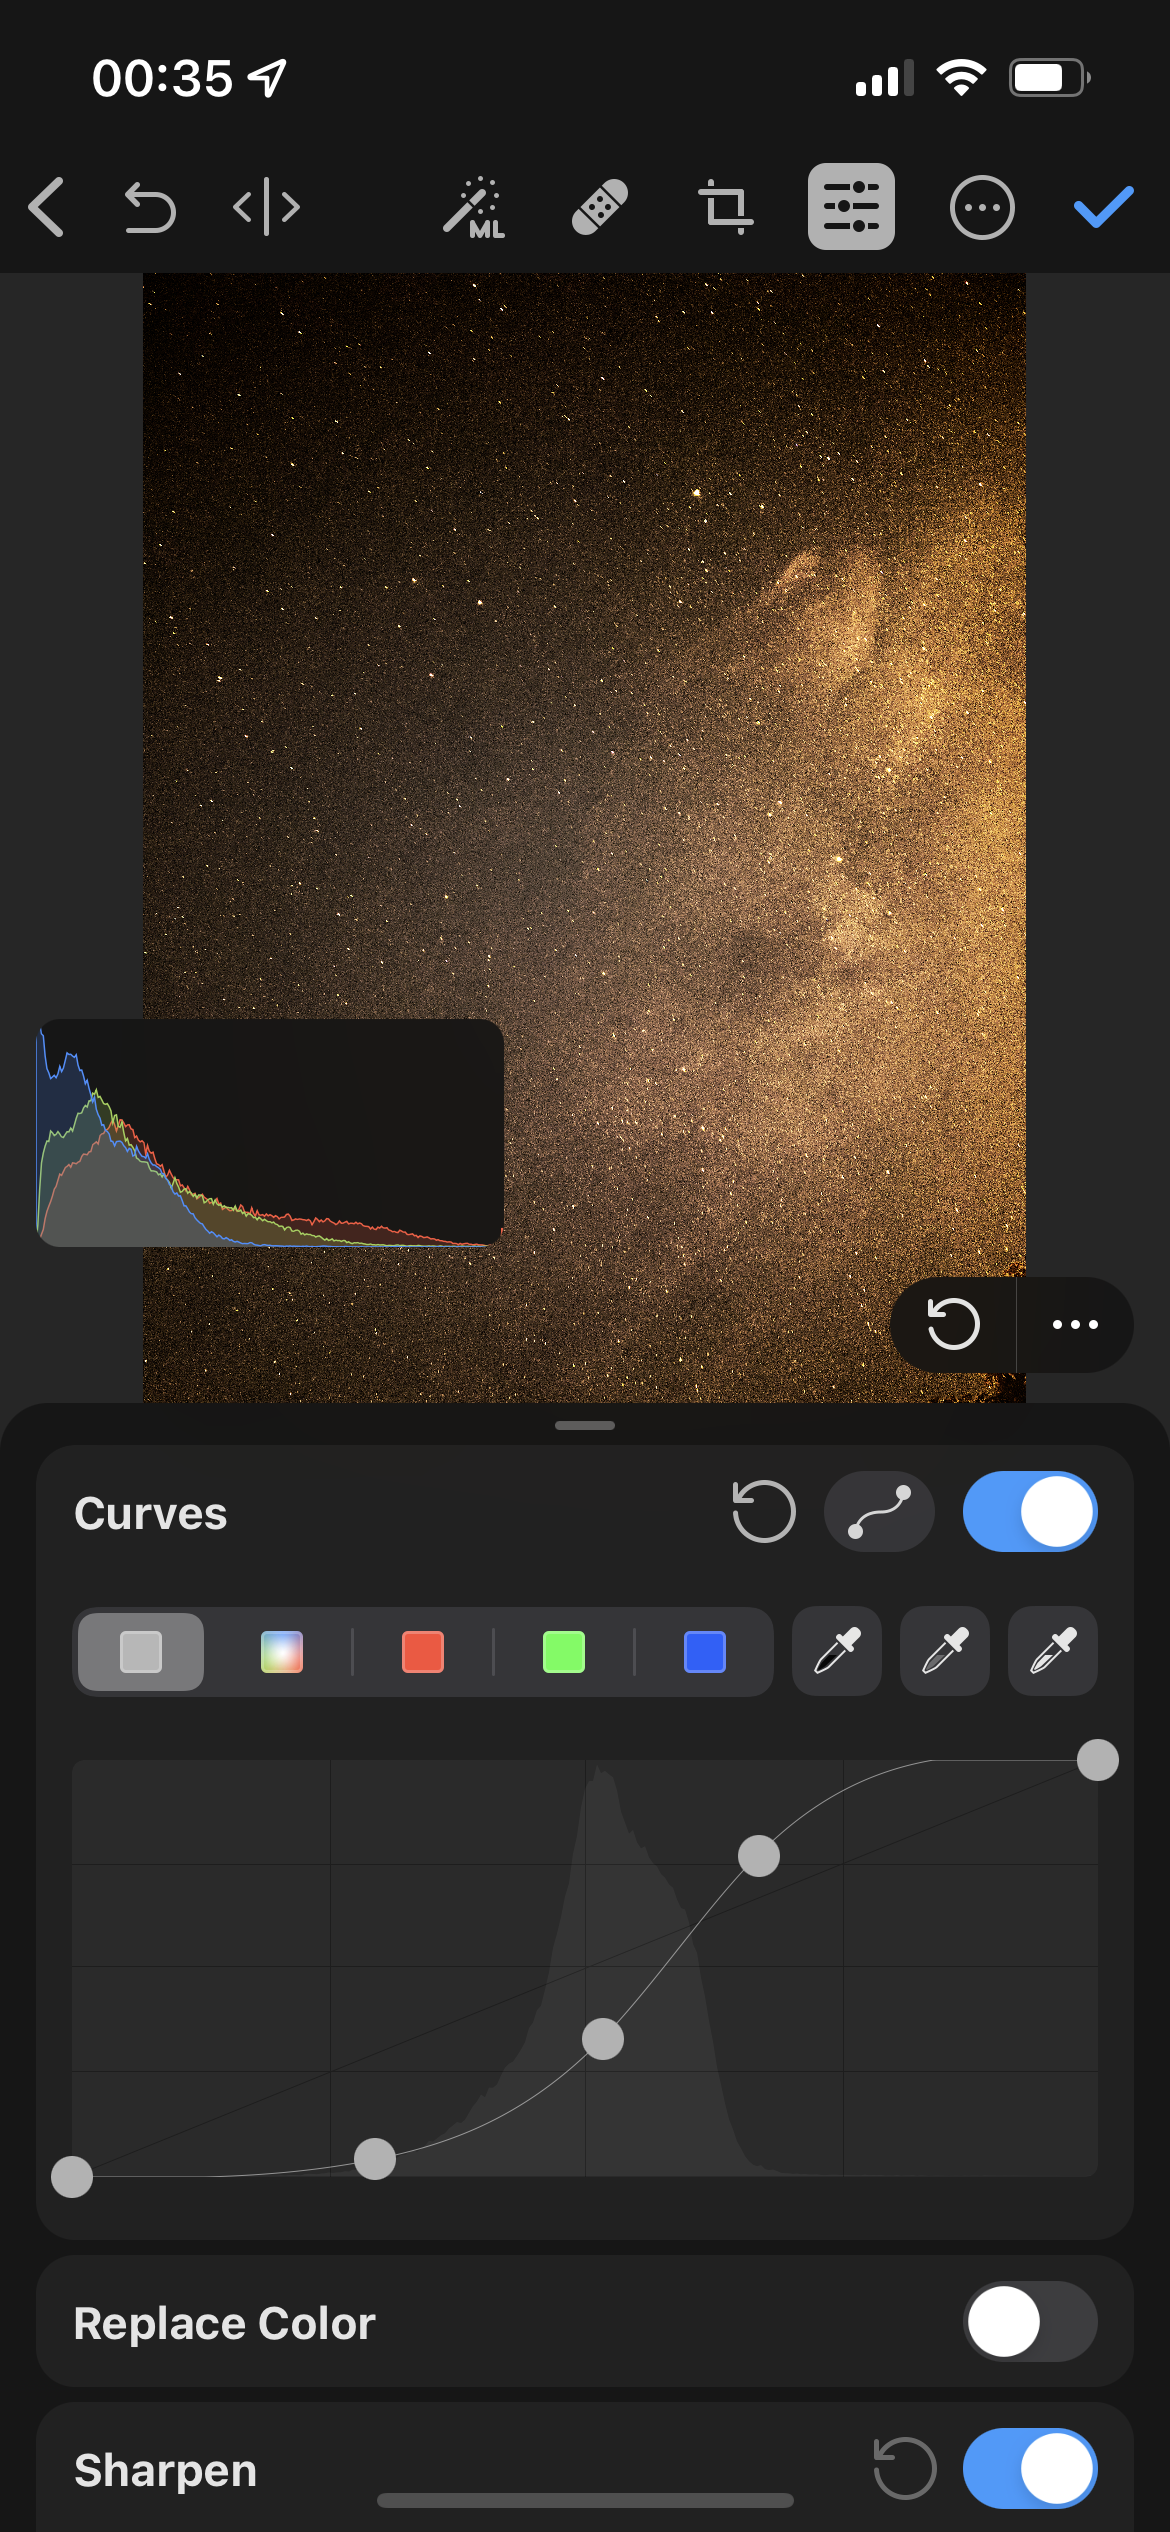
Processing photos – key points
Sure, you can spend hours, playing with all available settings to achieve the best possible result – and this could be surprisingly interesting.
However, there are 3 key settings which have the most impact on the result:
- Color temp
- Lightness settings
- Curves
I suggest changing Curves first, then tuning Color temp and Lightness settings. Here are some settings for reference:
 |
 |
 |
In addition, it could be useful to make changes in Selective color if your photo has unwanted glow at the center.
Hope this guide was helpful! Feel free to download my Pixelmator preset and play around with settings.